Showing posts with label chocolate. Show all posts

Monday, August 22, 2011

Peanut Butter Chocolate Chip Pretzel Ice Cream (or P.B.V.V.P.I.C. for short!)

It all started with this:
For any of you who haven't tried the amazingness that is TJ's Pb filled pretzels, you are missing out. 
It usually lasts two days in my house...and my roomie doesn't like them......

To comfort myself in the loss of such a scrumptious snack, I decided to use my newest gadget (I know it may seem like I am always getting a new gadget, but since I live far from home and rarely get to see my family, my birthday lasts longer than normal). 

Meet the ice cream maker.  (Thanks, Uncle Rob!!!!)
LOVE
When I showed this to my roommate she just shook her head.  Because she knows the truth.

The truth, my friends, is that I am in a long distance relationship.  Which means that I don't see my boyfriend that often.  So when he leaves.....things get ugly.

I have not put it past me to eat an entire half gallon of mint-chocolate chip (Edy's Slow-Churned!!) to drown my sorrows.  So to have the ability to make any kind of ice cream in 20 minutes or less......my hips are expanding at the mere thought of it.

But I digress...

I knew I had to somehow satisfy my peanut butter pretzel craving, so after a few minutes browsing the internet, I came up with this:
Peanut Butter Chocolate Chip Pretzel Ice Cream!!!!
I used this post on peanut butter ice cream and went to town with my own toppings.  It was so easy to make and I had all ingredients on hand!

Peanut Butter Chocolate Chip Pretzel Ice Cream
Adapted from Baked Bree's Recipe

1 cup creamy peanut butter
3/4 cup sugar
1 1/4 cup whole milk
2 cups heavy cream
2 teaspoons vanilla
1/2 cup chopped pretzels
1/2 cup chocolate chips (I had semisweet)

Melt the peanut butter in a saucepan.  Try not to eat melted peanut butter.
Add the milk. Stir until combined.
Add the cream, sugar, and vanilla. Stir until combined.

Chill mixture in the fridge.  Baked Bree recommended overnight--however, I was not so patient (half an hour it is!)...

Pour mixture in the beautiful ice cream machine.

Meanwhile, chop your pretzels and chocolate chips.  Snacking is allowed here (preferably with the reserved melted peanut butter that you had from a few steps back...)

Add toppings after the 20 minutes cooking (churning?) time.
Pour into an air tight container and freeze for at least 2 hours (I did overnight--I was too stuffed from the pretzels and peanut butter sauce).

 And feast!

This was AMAZING : )

I was so happy with this recipe, and it was ridiculously easy to make! I don't know if I will ever buy ice cream again!!!!

The ice cream itself tasted like the hardened peanut butter shell of a Friendly's sundae cup:
Source

Heaven, my friends, heaven.  The texture is amazing with the pretzels and the chocolate chips--I was worried that the pretzels might become soggy after freezing, but they were still crisp! 

I will definitely have some on stock in case of emergencies...in fact, I sense an emergency happening next Sunday when someone special leaves for Boston (*cough* Pat *cough*).

Enjoy!


Thursday, July 28, 2011

Smoothie Time!

Is it bad that I was a little sore today from laser tag? Not the i.cant.move.anymore. sore but the kind where you can definitely feel your muscles while walking.  Yeah, I need to start working out more.

Today continued the retirement festivities, so I was able to graze all day, eating potato salad, chips, and dessert.  With all of that sugar in mah belly, I decided a simple, refreshing dinner was needed.

The smoothie.
For some reason, I was always intimidated by smoothies.  Never made them, rarely eat them (unless they are from Robeks).

So, after eating empty calories all day, I decided to add some nutrition to my life.

Looking at a few recipes, I quickly learned that frozen fruit was best, as you don't have to add ice to the smoothies.

Using that knowledge, and starting with this recipe, I made the.best.thing.ever.

Even better than these or these.

Chocolate Strawberry and Pineapple Smoothie
1/4 cup of vanilla almond milk
1 frozen banana
1 cup strawberries
1/2 cup frozen pineapple
1 tablespoon chocolate peanut butter

Blend all the ingredients together.  (that's it!!!)

So creamy, fruity, and with a hint of chocolate, this smoothie was to die for.  It was surprisingly filling and it tasted just like something I would have gotten from Robeks, but sooo much cheaper.  And I get to pick the flavor combinations! I recommend freezing the fruit (the only fruit I didn't freeze were the strawberries) because the smoothie didn't get too thick.  It was perfect, and I am so happy I have a little left over, so I can have this on my drive in to work tomorrow.  : )

Now that I am officially a smoothie convert, I cannot wait to see what other concoctions I can make!

Legendary.

I just found my new favorite pasttime. But you have to promise not to laugh.
Please tell me that all of you have seen this show?!

A woman at my work is retiring, so to send her off appropriately, the only logical thing was to take her laser tagging (?)!!!  This is the first time I have ever played, and let me tell you, after the first game I got so intense that I started screaming “You can leave now!!!!!” to every opponent I hit…..let’s just say I enjoyed the game : ) It also was a wicked good workout (yes, I am originally from Massachusetts), as things started to get a little smelly by the second game.

Once I got home, I still had the adrenaline rush from the games, so all I could think of was having a big chunk of meat for dinner (I guess aggression brings out the caveman in me…).  Since the only thing in the fridge that was defrosted was chicken, I went with that. 

BBQ Chicken Lettuce Wraps
By: Me!
(this is for 1 serving, but can be easily doubled, or if you are feeling really hungry...tripled!)

1 Chicken Breast
1/2 cup of your favorite BBQ sauce (I used Sweet Baby Ray's; use as much to cover the chicken entirely)
1/2 Hass avocado
Squeeze of lime juice
3-4 Romaine leaves, with the stalk taken out (1 leaf per sandwich)
Sprinkle of feta
Salt and Pepper

Pound out chicken to ensure even thickness.  I used a soup can and pounded the heck out of that chicken (I think I still had some "energy" left over from the laser tag!). 
Cover in BBQ sauce and marinate for 30 minutes to overnight.  I just thought of the idea when I got home, so 30 minutes it was!
 Grill chicken until cooked, about 8-10 minutes on each side.  Let rest.

Don't worry, I didn't eat both of them--one's for lunch tomorrow!
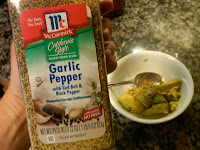
 Cut up half of avocado and roughly chop.  Sprinkle with lime juice to prevent oxidation and add salt and pepper (I used garlic pepper...yum!).

I put this stuff on.everything.

Sidenote: Check out this cool Salt grinder that my roomie
 got me for my birthday!!!
Take romaine leaves and cut out the thick stalk in the middle so you will be able to roll up the lettuce with the filling.  Lay on table and add avocados and feta.
Cut up chicken on an angle and arrange.

 Roll up and serve!
It is a little messy, but it is so crunchy and good!!!!
These are so good, folks and so easy to make! You can use basically whatever you have in the fridge for protein and veggies.  Traditionally, lettuce wraps are used with Bibb lettuce, but (once again) since I thought of the idea when I came home, I used what I had in my fridge--adaption is the key to cooking! One shouldn't spend $343 million dollars (ok, a little exaggeration) for one ingredient that you will use once, when you can substitute efficiently.  Check this website for other substitutions, or just use your noggin : )

Now on to dessert....

Kristin made cheesecake stuffed strawberries (omg!) the other day, but since I don't like cheesecake, I decided to do my own thing...with this:
I walked past this in the supermarket and couldn't leave it there with a clean conscience.  Dark.Chocolate.Peanut.Butter?!?!?!!? 

So I cored the strawberries, and spooned that magical concoction into the strawberries. 
Delish.  It would be even better with a topping of fresh whipped cream, but alas, my fridge was lacking that as well.  Maybe I should go shopping...

The pb didn't detract from the sweetness of the strawberries--in fact, it reminded me of chocolate covered strawberries, with a little "oomf".  One would think that peanut butter would clash with the strawberries, but trust me.  The peanut butter flavor isn't really prominent in this spread--the chocolate is.  And isn't that how life should be?

Enjoy!


Thursday, July 7, 2011

Thin Mint Truffles (or the desperate attempt at self-control)

This past Monday, my boss gave me a box of Thin Mints.  These cookies are easily my weakness (not the cute girls in uniform asking you to give them money), and they are even better straight from the freezer.  My boss is aware of this, and I think she was giving me these to get me back from not showing up with promised doughnuts. 

I had mixed feelings upon receipt of that box—I absolutely LOVE them, but God knows that they would be gone in about one day (and one night of late night snacking), so I knew that I would have to get rid of them as soon as possible.

I was having people over on Wednesday to celebrate my birthday, so I knew that I would be able to persuade people to eat them. 

So the brainstorming began. 
And I came up with Thin Mint Truffles.  A.m.a.z.i.n.g. (and simple too!).  I used this recipe for the chocolate filling, but came up with the rest of the recipe in hopes that I won’t be left alone with the cookies (it may have been my birthday, but my thighs wouldn’t have cared about that once they started expanding to accommodate those mint delights).
I apologize for the lack of pictures, but if you have any questions on how to make the truffle base, I would go to the link above or to my go-to-girl, Annie (and these are amazing as well!).  I got so excited that I thought eating the melted chocolate was more important than taking pictures of it : ) You understand.

Thin Mint Truffles
By: Me
1 cup of Thin Mints
12oz bittersweet chocolate (Ghodiva, please!)
8 oz semisweet chocolate (I used some chocolate chips)
1 1/3 cup heavy whipping cream
1 tsp peppermint extract
Self-control

I took about one sleeve of Thin Mints, roughly chopped them, and set them aside in a small bowl.  I also took the leftover crumbs from said chopping and put them in another side bowl (trust me, this will make sense very soon!).

Roughly chop the bittersweet chocolate and place in a separate bowl.  Bring heavy cream to a boil, and pour it over the bittersweet chocolate and stir until chocolate is completely melted and the mixture is smooth.  Add peppermint extract.

Put melted chocolate in the freezer for about 2 hours, or until set. About half way through, take bowl out and stir in the cup of chopped Thin Mints.  Place back in freezer for the rest of the time.

Just before you are about to take out the chocolate from the freezer, melt the semisweet chocolate in a double boiler.

After you take the chocolate out of the freezer, scoop out about 2 tablespoons of chocolate and form into a ball.  Dip in the melted semisweet chocolate.  Immediately after that, roll in the leftover Thin Mint crumbs.

 
Do you see the bite of the thin mint in the truffle??
Life.changing.

Guys, this was amazing!!!!! Not overly pepperminty (is that even a word?), but rich and decadent at the same time.  It looks like you slaved in the kitchen, when really (aside from the two hours in the freezer) it takes about 20 minutes!  The added thin mints in the actual truffle made the texture amazing---the creamy, dark chocolate base with the crunchy bits of Thin Mints was truly perfect.  The leftover crumbs was a last-minute decision, but I think it really made the presentation (and you don’t waste one crumb of these beauties!).

The only problem I had was that the chocolate took a little longer to set, so I couldn’t finish them for the birthday party.  So I brought them into work.  My coworkers didn’t seem that upset : )


Wednesday, July 6, 2011

Buckeyes....Happy Birthday, Rachel!

The Occasional Oenophile made these for me for my bday!  See how she did it : )

Buckeyes
1/2 stick of butter
1c peanut butter
1 tsp vanilla
lots of powdered sugar (1 cup or more)
1 12oz bag semisweet chocolate chips (watch out for parrafin wax and hydrogenated oils)
1 extra tbsp butter
Mix the 1/2 stick of butter and the peanut butter together with the vanilla til blended.  Then add the powdered sugar a little at a time, so it blends.  It's best to do this part with your hands.  The peanut butter ball should be firm, and peices of it should break off more than melt away when you've added enough sugar, kinda like the consistency of the inside of a Reese's cup.  You'll end up with a giant ball of peanut butter dough.  Chill this in the fridge for at least 30 mins.  If you're in a rush, the freezer will do.
 
In a separate bowl, melt your chocolate chips.  Many cooks like to do this in a water bath, but I find that it saves time to just nuke them (sacrilege, I'm sure!).  The trick is to be very careful and methodical about the melting, or you'll end up with nasty, burnt chocolate.  I find that this works in my microwave: 30seconds on high, take out and mix, 30 seconds on high, take out and blend completely.  The morsels will continue to melt as you blend, so don't put it back in the microwave even if it doesn't look melted all the way.  Once your chocolate is smooth, mix in the extra tablespoon of butter until blended completely.  This adds a sheen to the chocolate that most American chocolate companies get by adding parrafin wax (ew!).
 Take the peanut butter out of the fridge. 
 Break off a small piece (1/2" diameter) and roll into a ball.  Be careful not to handle it too much or your dough will begin to melt in your hands, making the next step that much harder.  Once your ball is formed, stick a toothpick in the top, about halfway through. 
Holding the toothpick, dip the ball into the melted chocolate to coat the outsides. 
Carefully remove the ball without dislodging the toothpick (it usually helps to have a spoon ready in the bowl to catch defectors).  Place the finished product on a baking sheet covered in wax paper.   Repeat this process until you run out of peanut butter and/or chocolate. 
Chill your buckeyes on the baking sheet in the fridge or freezer overnight, and make sure to store them in a cool place.  I find that they keep in the freezer quite well.  If you allow them to melt, they'll start to stick together and fall apart. 
I feel compelled to warn you that they are addictive and contain 119 calories a piece, so pace yourself. :)
Happy Birthday Rachel!

Thursday, June 30, 2011

A Learning Experience

I came home today starving, so I reheated some gyozas. Amazing, folks!  I made a huge batch of these on Sunday, and froze them.  It only needed half a pound of meat (I used ground chicken), and it made about 30 pot stickers! All you have to do is sear the bottom and then steam them for 3 minutes.


                      YUM


I also must make a confession.  Today, I may have done something that was less than brilliant.  See, I have an addiction.  With popcorn.  Literally every day when I get home, immediately after dinner, I will make some stovetop popcorn.  I will then bring the pot in the living room for some quality time with my roomie and some Real Housewives.  Today didn't go so smoothly.
Yeah, the pan was so hot that it melted the carpet...my roomie's carpet. Awk.  Hopefully she still loves me!

If she still did, maybe not anymore....heehee
So much for my popcorn addiction.

I was also a failure in the gym department today, as I was too focused on carpet cleanup and scarfing down some fabulous gyozas.  Boo. 


While I was digesting dinner (and aforementioned popcorn), I decided to explore one of the most popular foods in the United States.  Over 10 billion of these products are consumed by the US alone each year (Source
Source
The doughnut.  Hundreds if not thousands different variations of them--and not one have I really caught on to (except for the occasional chocolate munchkin…).  Don’t get me wrong, I love chocolate, cake, and sprinkles, but I would honestly rather have this than a Krispy Kreme. 

Still, ever since I saw a mini doughnut pan I wanted to expand my horizons and try something new.  After looking through a few blogs, I settled on this recipe.

Baked Chocolate Cake Doughnuts
1 cup all purpose flour

2 tablespoons natural cocoa powder

1teaspoon baking powder

1/4 teaspoon baking soda

2/3 cups sugar

1/2 teaspoon freshly ground nutmeg

1/2 teaspoon fine grain salt

2 tablespoons unsalted butter or coconut oil

1/4 cup buttermilk

1/4 cup yogurt

1 teaspoon vanilla extract

1 large egg

Lightly grease a doughnut (or muffin) tin and preheat the oven to 350F.  Sift the flour, cocoa powder, baking powder and baking soda, and then whisk in the sugar, nutmeg and salt.
Add the butter, and using your fingers, rub it into the dry ingredients until it becomes coarse crumbs.
Ew...... The feeling of butter on your hands is the WORST
In a separate bowl, whisk together the buttermilk, yogurt, vanilla and egg. Add to the flour mixture and stir until just combined. Do not overmix, or your doughnuts may be a bit rubbery.
Fill each cup 1/2 to 3/4 full.  Bake for 6 to 10 minutes (depending on the size of your doughnut pan), until the doughnuts spring back when touched.


Lara recommended using a piping bag to ensure even distribution of the batter as well as a cleaner finish in the pan. However, I puffed out my chest with my newly found badge of "Blogger" and neglected to use the piping bag.  This was the result:
FAIL
Try 2 with the piping bag
Much better :)

Lara also said that this batter makes about 15 mini doughnuts.  <--- I found that in using my mini doughnut pan, the amount of batter I had left over after three batches seemed enough for 1500 mini doughnuts. So come on down, I have lots left over.


Overall, I was happy with the result, but I wished that the doughnut was a little more dense.  The consistency reminded me of a cupcake, and, not to bash on the doughnut, but if I were to want something that tasted like a cupcake, I would want a cupcake.

So tomorrow, I will attempt once again on the marvel that is a doughnut--but with new ingredients.  And I will make microwave popcorn.
To be continued : )

PS Don't worry Vanessa, come Tuesday at work I will have a load of these babies with your name on it!